I was reading Tosca Reno's website because she has a new book coming out; and somewhere along the line she suggested you keep a shopping list on your fridge. INSPIRATION STRUCK!
What if I could stamp a list, instead of buying a pad that I'd have to throw away - what if I could make something, where you replace the pad, not the decoration???
I played around in my stamping cave and came up with this: Too cute!
Then I decided: I shall do a tutorial so all stampers can have a fun shopping list. Here you go:
Fridge Shopping List Tutorial:
Gather your supplies:
Cut your notepad in half. I used half a pad for my first time. An exacto knife, or box cutter works wonders:
Decorate your paper. Use your corner rounder on your paper because the square coasters naturally have their corner's rounded. I cut the red paper 4" X 4" and the cream paper with the leaves at 3.75" X 3.75":
Mount your paper and set aside: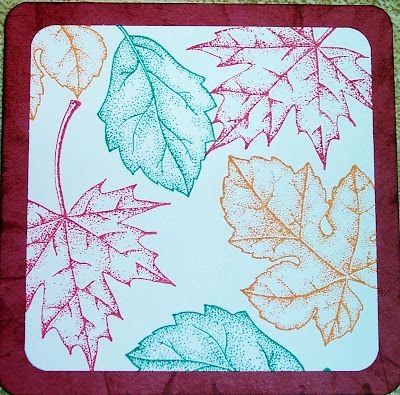 Mark your coaster, about 3/4" in from edges to use as a guide for your punch:
 Punch your hole (I pushed the punch all the way in for my depth guide):

Adhere your decorated paper to the side of the coaster with the lines:
Punch the paper:
Punch a hole with your crop o dile. This is what will secure your pen:
Tie your ribbon to the pen cap - I used a square knot. Wrap the ribbon around the pen cap: Pull the ribbon through the hole you punched:
 Pull the ribbon tight, so the pen cap is square, and exactly where you want it. Once secure, tape the ribbon to the back of the coaster:
 Get your business card magnet (I get mine from Staples):
Peel the label, and apply magnet OVER the ribbon: Take your notepad, and separate the cardboard from the paper:
 Slide cardboard through your hole:
 You'll really need to pull the notepad DOWN. The cardboard will slide down the coaster, so the top of your hole is touching the tip top of the pad - this is what allows the pad to lay flat:
 Decorate your pen:
 And you're done!
 Other notes:
Because of the thickness of the coaster, punched that first, adhered the decorated paper, and punched again. I didn't think that punch would be able to handle everything at once.
Obviously, you can take this farther by covering the tip of the notepad with paper. The sky's the limit.
HAPPY CREATING!
Peace & Blessings!
Sunday, September 2, 2007
Fridge Shopping List Tutorial
Subscribe to:
Post Comments (Atom)








2 comments:
Thanks Alison,
This is Celest Benn from www.freebirthdaystuff.com it is so kind of you to put me on your site.
Keep up the good works.
Celest
cool I can't wait to try this when my window punch comes..thank you for the inpiration.
Post a Comment